JTAG via OpenOCD
To use OpenOCD, you first need a corresponding Jtag-adaptor to connect to the hardware. A pre-patched version of the software can be found on a recent version of the support-CD for your board.
Configuration file
Before OpenOCD can be used a configuration-file suitable to the actual setup has to be generated. Using the ICprog OpenOCD and a ICnova SAM9G45 OEM, the following lines should be saved in a file called openocd.cfg:
 source [find interface/openocd-usb.cfg]
 source [find target/at91sam9g45.cfg]
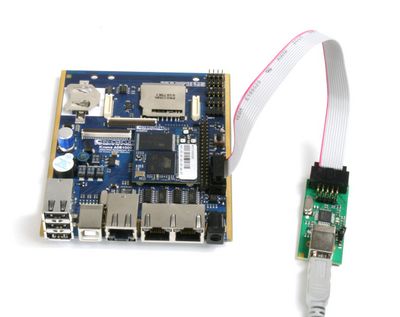
Afterwards OpenOCD can be used by specifying this file on the command line. The devices should be connected as shown on the picture below.
Commands
The following section will provide some example commands.
Writing the bootloader
Using a ICnova SAM9G45 OEM, the following commandline will write the bootloader into the flash.
openocd -f openocd.cfg -c “flash erase_sector 0 0 2” -c “flash write_image norflash_icnova_arm9.bin 0x10000000” -c “flash write_image u-boot.bin 0x10020000” -c shutdown
The parameter -f openocd.cfg specifies the configuration file. Any occurence of -c will tell openocd to execute the command. The commands flash erase_sector 0 0 2 deletes the the first 3 Sectors (0, 1 and 2) of the NOR-Flash (with ID 0). To delete just the U-Boot (sectors 1 and 2) flash erase_sector 0 1 2 has to be used. The command flash write_image norflash_icnova_arm9.bin 0x10000000 writes the content of the file norflash_icnova_arm9.bin into the memory at address 0x10000000. As this is the NOR-Flashs start-address, the first sector will be used. The command shutdown stops openocd. Otherwise the openocd would start its server-functionality and wait for a suitable connection.
The exact commands for other modules can be found in the corresponding Memory map for that device.
