Difference between revisions of "SIGNALduino Stick"
| Line 27: | Line 27: | ||
*available with 433 oder 868MHz transceiver | *available with 433 oder 868MHz transceiver | ||
*Antenna 5cm +3dBi included | *Antenna 5cm +3dBi included | ||
| + | |||
=SIGNALduino Stick & FHEM= | =SIGNALduino Stick & FHEM= | ||
Revision as of 16:33, 19 March 2018
Contents |
Hardware

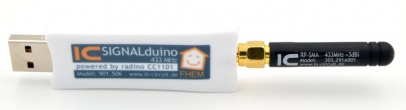
The SIGNALduino Stick combines our fully Arduino compatible radino CC1101 Module with the handy format of a USB Stick. The SIGNALduino Stick comes in two different versions, either with 433 or 868MHz radio front end.
The utilized microcontroller is an Atmega 32U4 with 8MHz clock frequency. The CC1101 RF-Transceiver form Texas Instruments is used as radio front end either configured in 433MHz or 868MHz mode.
It is able to receive and transmitt different communication protocols depending on the utilized firmware. In this manner it can be used to receive and transmit data from/to different devices via a FHEM Server.
The SIGNALduino Stick comes preflashed with the SIGNALDuino_radinoCC1101.hex firmware.
It behaves like an Arduino Micro and can be programmed using the Arduino IDE.
Features:
- Arduino campatible (Atmega 32U4 Processor, 8MHz)
- CC1101 Transceiver (433 or 868MHz)
- USB-A Plug
- RP-SMA Antenna Connector
- Input voltage: 5 VDC (USB)
- on Board 3.3V regulator
- Reset- and boot-select-(BSL) Button
- User LED, RX/TX LEDs and Power-LED
- available with 433 oder 868MHz transceiver
- Antenna 5cm +3dBi included
SIGNALduino Stick & FHEM
This is a short instruction on checking if your SIGNALduino Stick is working correctly and connecting it to FHEM running on a raspberry Pi.
Our utilized test setup looks like this:
- Raspberry Pi 3 Model B running Raspbian Stretch Lite
- with screen and Keyboard connected
- network connection via LAN-Cable
- FHEM installed and updated, according to this instructions
- SIGNALduino Stick 868MHz
- PC running Win7 Professional 64Bit
- connected to the network via LAN cable
Check the SIGNALduino Firmware
The SIGNALduino Stick comes with preinstalled SIGNALDuino_radinoCC1101.hex firmware. To check if it is working correctly, connect the Stick to an USB port of your PC and open a serial connection using a serial port monitor e.g. Putty at 57600 Baud.
- Starting the connection leads to:
 Init eeprom to defaults after flash
 ccFactoryReset done
 CCVersion=20
 CCPartnum=0
 CC1101 found
 Starting timerjob
 receiver enabled
- Typing V<ENTER> shows something like this:
V 3.3.1-dev SIGNALduino cc1101 (868Mhz )- compiled at Mar 10 2017 23:27:29
- The shown frequency depends on the Version of the SIGNALduino Stick.
- If this message shows up, the SIGNALduino Firmware works correctly.
Connect the SIGNALduino Stick to FHEM
The following steps are also described in detail in the FHEM-Wiki
Determining the SIGNALduino's device path
- Connect the SIGNALDuino Stick to the Raspberry Pi while monitoring messages:
 pi@raspberrypi:~$ tail -f /var/log/messages
 [...]
 Mar  6 10:15:37 raspberrypi kernel: [   92.131244] usb 1-1.4: new full-speed USB device number 6 using dwc_otg
 Mar  6 10:15:37 raspberrypi kernel: [   92.282248] usb 1-1.4: New USB device found, idVendor=1da9, idProduct=002c
 Mar  6 10:15:37 raspberrypi kernel: [   92.282261] usb 1-1.4: New USB device strings: Mfr=1, Product=2, SerialNumber=3
 Mar  6 10:15:37 raspberrypi kernel: [   92.282269] usb 1-1.4: Product: radino CC1101
 Mar  6 10:15:37 raspberrypi kernel: [   92.282276] usb 1-1.4: Manufacturer: Unknown
 Mar  6 10:15:37 raspberrypi kernel: [   92.283479] cdc_acm 1-1.4:1.0: ttyACM0: USB ACM device
 Mar  6 10:15:37 raspberrypi mtp-probe: checking bus 1, device 6: "/sys/devices/platform/soc/3f980000.usb/usb1/1-1/1-1.4"
 Mar  6 10:15:37 raspberrypi mtp-probe: bus: 1, device: 6 was not an MTP device
Product: radino CC1101should appear- Dertermine the SIGNALduino's device path:
 pi@raspberrypi:/$ ls /dev/serial/by-id/ -l
 total 0
 lrwxrwxrwx 1 root root 13 Mar  6 10:15 usb-Unknown_radino_CC1101-if00 -> ../../ttyACM0
- In this case the port is:
usb-Unknown_radino_CC1101-if00
Update FHEM
- The following steps are done in FHEM
- Open a browser on your PC and enter FHEM:
http://<IP-adress>:8083/fhem - Update FHEM:
update
- Update the SIGNALduino Module:
update all https://raw.githubusercontent.com/RFD-FHEM/RFFHEM/dev-r33/controls_signalduino.txt
- Restart the website:
shutdown restart
Defining the SIGNALduino Stick in FHEM
- Define the SIGNALduino Stick in the FHEM command line by its port:
define radinoCC1101 SIGNALduino /dev/serial/by-id/usb-Unknown_radino_CC1101-if00
- The Stick is now being listed as
radinoCC1101in the DeviceOverview - Reset the Stick by
setresetparameter - IMPORTANT: When using the 868MHz version of the SIGNALduino Stick, the operating frequency has to be changed manually
- Therefor
setthe parametercc1101_freqof radinoCC1101 to868.35 - check if the frequency has been set correctly:
getccconfig
- Therefor
ccconf: freq:868.350MHz bWidth:325KHz rAmpl:42dB sens:4dB (DataRate:5603.79Baud)
Flashing new Firmware
The SIGNALduino Stick is fully Arduino compatible. If you want to program it using the Arduino IDE, you just have to download the Arduino Library for radino. (See also radino/radino32 software)
To flash a new firmare, the SIGNALduino Stick sometimes needs to be set to bootloader mode manually beforehand, by pressing the reset button twice. The bootloader mode is indicated by fading status LED.
Be aware that the Stick has an other serial port number in bootloader mode.