Create Android Apps
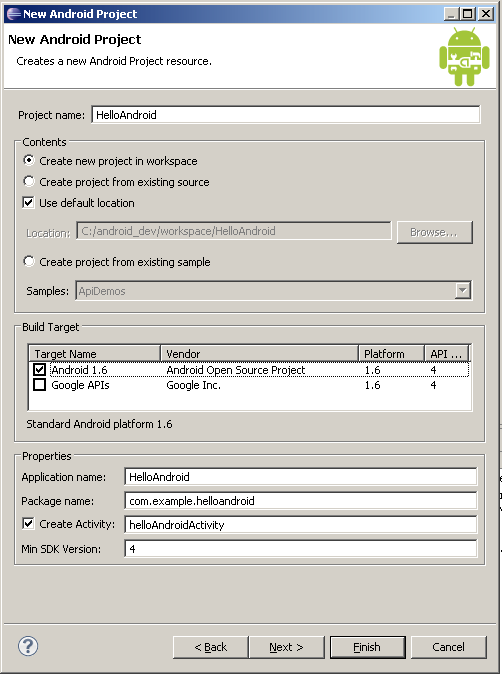
To create a new App with Eclipse, first a new project has to be created via File->New->Project.... In the Project Wizard Android Project should be choosen. Afterwards the project name and the build-target has to be set. The build target must be Android 1.6.
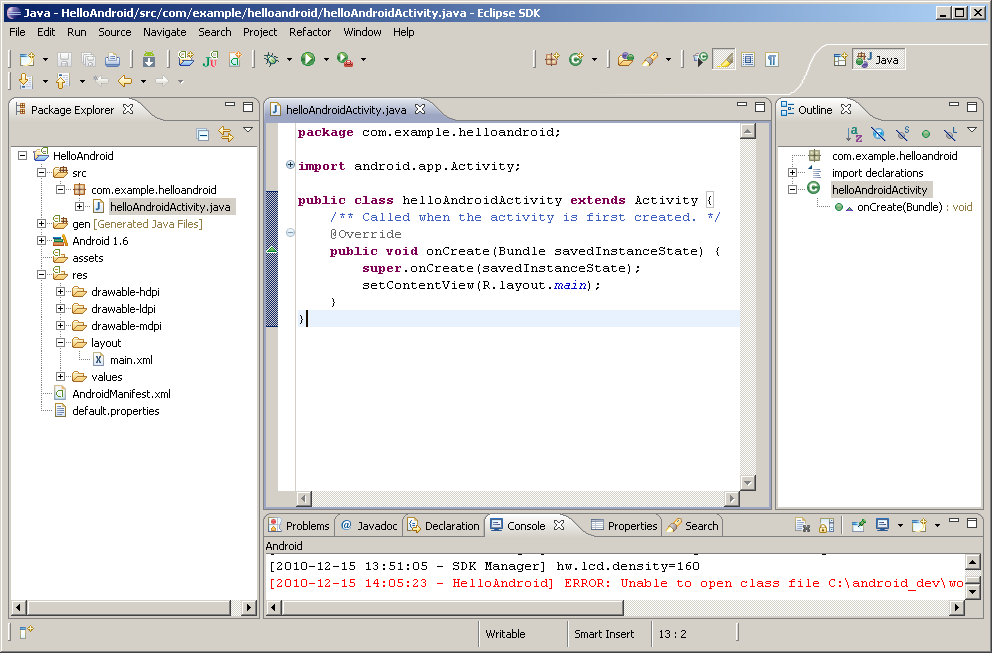
By clicking Finish the new project will be created. This will create a new Activity within src, a new layout for your app within res/layout and a new AndroidManifest.xml.
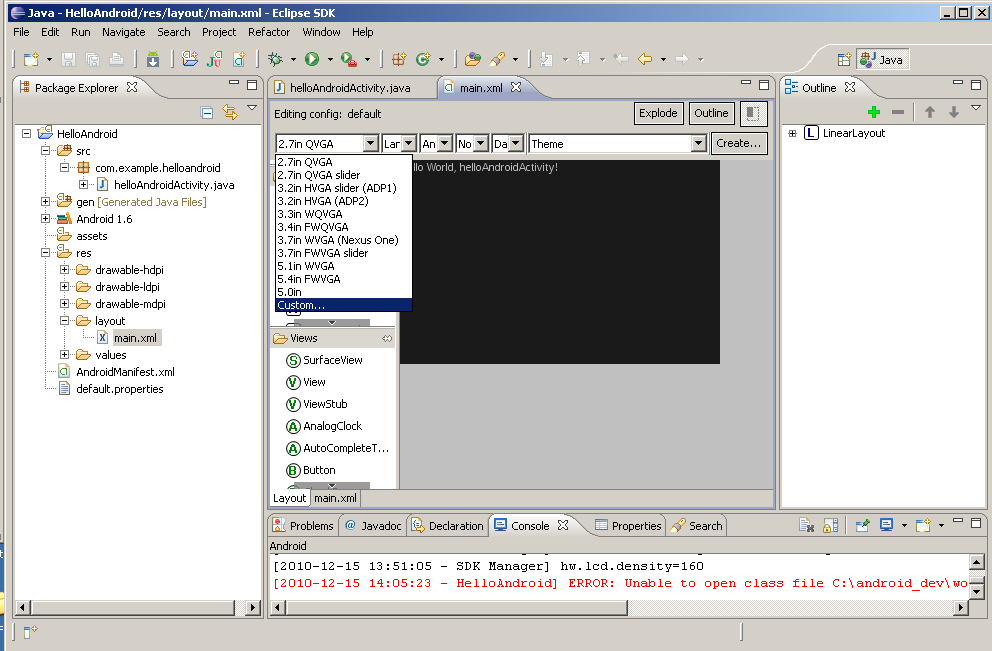
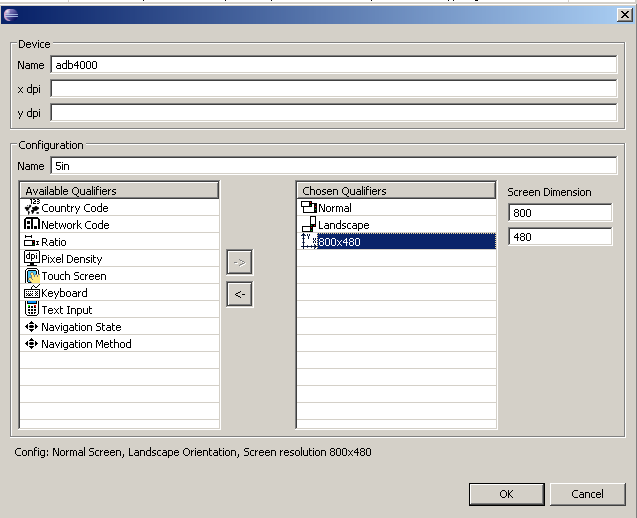
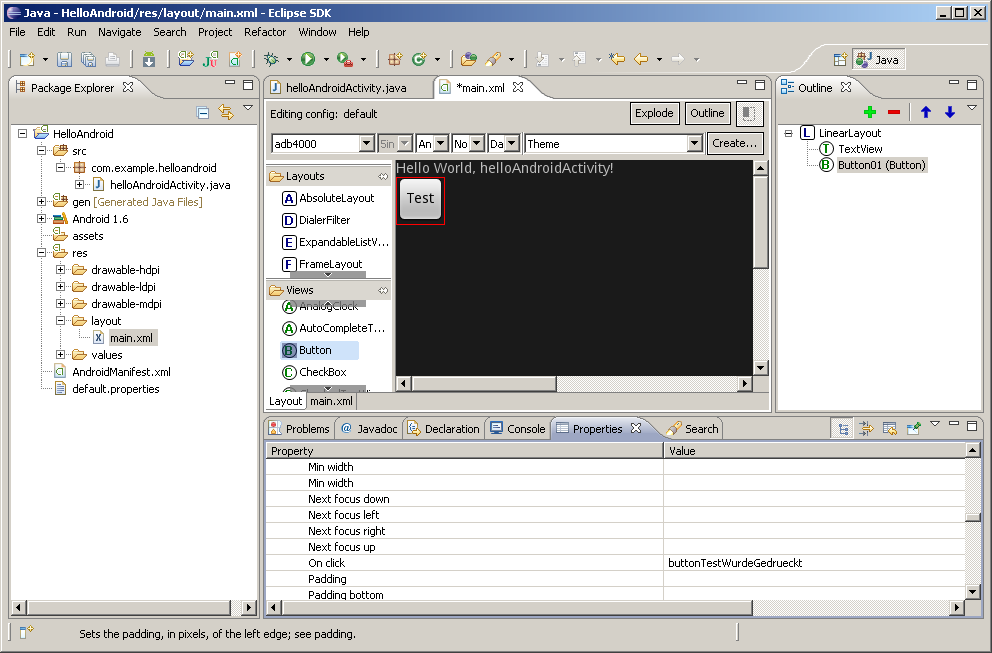
Now the file main.xml within res/layout can be opened. To set up the screen and its size correctly, a new custom screen has to be created. By clicking Custom and New..., a new Window appears to set up the Display.
Here, the following settings should be made:
- Device Name: adb4000
- Configuration Name: 5in
- Size: Normal
- Orientation: Landscape
- Dimension: 800x480
Using the OK-button, the new screen will be created. Afterwards it should be selected from the drop-down menu.
The default layout consists of a LinearLayout' with a single TextView. To remove an item, right-click it and select Remove. New elements can be added by drag'n'drop. To add a Button for example, it simply can be moved from the list at the left site into the LinearLayout. Its properties can be modified using the corresponding tab in the lower part of the window. Modifiying the attribute Text will change the text displayed on the butten. To handle a click on this button, the attribute On Click should be set to the name of a function to be called, eg 'buttonTestClicked'. This function has to be found within the Activity, using that layout.
The corresponding helloAndroidActivity could be like this:
package com.example.helloandroid;
import android.app.Activity;
import android.os.Bundle;
import android.view.View;
import android.widget.Button

public class helloAndroidActivity extends Activity {
    /** Called when the activity is first created. */
    @Override
    public void onCreate(Bundle savedInstanceState) {
        super.onCreate(savedInstanceState);
        setContentView(R.layout.main);
    }

    public void buttonClicked(View view){
	Button button = (Button) findViewById(R.id.Button01);
	button.setText("clicked");
    }
}
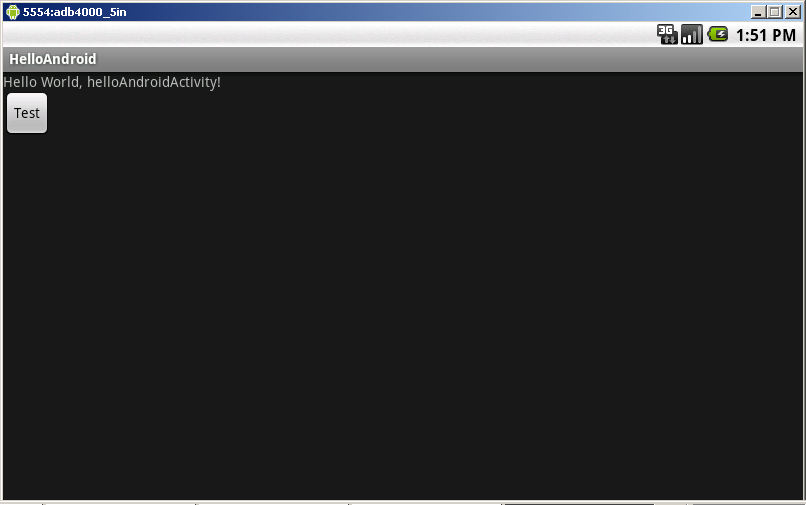
The app can be run within the virtual device by clicking the Run-button. Afterwards the application might look like this:
To test the app on real hardware, it should be signed in advance. By right-clicking the project in the tree, Android Tools->Export Signed Application Package... can be selected. If there is no key present to sign the application, one can be created during the following steps.
More information and tutorials can be found at the android developers site: http://developer.android.com/guide/tutorials/hello-world.html

