Difference between revisions of "ICnova A20 SODIMM"
(→Suitable application development boards) |
|||
| (36 intermediate revisions by one user not shown) | |||
| Line 3: | Line 3: | ||
'''ICnova A20 SODIMM''' - high performance dual CORTEX-A7 SODIMM-200 compute module | '''ICnova A20 SODIMM''' - high performance dual CORTEX-A7 SODIMM-200 compute module | ||
| − | [[File: | + | [[File:901.244B005_45_1000_s.png | 250px | thumb | right | ICnova A20 SODIMM |link=https://in-circuit.de/shop/a20-allwinner-soc-sompi/]] |
| Line 40: | Line 40: | ||
|- | |- | ||
|[[ICnova ADB4006]] | |[[ICnova ADB4006]] | ||
| − | |[[File: | + | |[[File:901.318_mit_901.244B005_45_full.png|150px|left|link=ICnova ADB4006]] |
|5V DC | |5V DC | ||
|HDMI connector, Ethernet, SATA interface, Analog audio input/output | |HDMI connector, Ethernet, SATA interface, Analog audio input/output | ||
| Line 56: | Line 56: | ||
---- | ---- | ||
| − | === | + | === Quick start === |
| + | |||
| + | ==== Download an image ==== | ||
| + | |||
| + | Download an image from the provided '''Debian/Ubuntu''' options. | ||
{| class="wikitable" | {| class="wikitable" | ||
| Line 64: | Line 68: | ||
!Kernel | !Kernel | ||
!Download | !Download | ||
| − | ! | + | !sha256 checksum |
| − | + | |- | |
| + | |Debian 11 (bullseye) | ||
| + | |2024.07 | ||
| + | |6.6.56 | ||
| + | |https://ic42.de/Download/icnova/sompi-6.6.56-bullseye.img.gz | ||
| + | |3fef2ceaad492767b1d09b20be0090007931c383956600ba37deb699fade9c9d | ||
|- | |- | ||
|Debian 12 (bookworm) | |Debian 12 (bookworm) | ||
|2024.07 | |2024.07 | ||
| − | |6.6. | + | |6.6.56 |
| − | | | + | |https://ic42.de/Download/icnova/sompi-6.6.56-bookworm.img.gz |
| − | | | + | |146fa93acdd397d6d2724f1fefdf64b272d27ed8818840c8bd074f9c8b0d5ee2 |
|- | |- | ||
|Ubuntu 22.04 (jammy) | |Ubuntu 22.04 (jammy) | ||
|2024.07 | |2024.07 | ||
| − | |6.6. | + | |6.6.56 |
| − | + | |https://ic42.de/Download/icnova/sompi-6.6.56-jammy.img.gz | |
| − | + | |655a2bf615b06400424da85e2ae47a18892a54a61ad17403f861df38b3337016 | |
| − | |- | + | |
| − | + | ||
| − | + | ||
| − | + | ||
| − | + | ||
| − | | | + | |
|- | |- | ||
|} | |} | ||
| + | |||
| + | ==== Flashing the image onto the SD card ==== | ||
| + | |||
| + | # '''Prepare the SD card:''' Insert the SD card (at least 8GB) into your laptop/PC. | ||
| + | # '''Download BalenaEtcher:''' A free tool for flashing images, available for Windows, Mac, and Linux at https://www.balena.io/. | ||
| + | # '''Flash the image:''' Open Etcher, select the downloaded image and your SD card, then click "Flash." This will take a few minutes. | ||
| + | |||
| + | [[File:ICnova-A20-SODIMM-balenaEtcher-jammy.png | 420px]] | ||
| + | |||
| + | ==== Connecting the ADB4006 ==== | ||
| + | |||
| + | Insert the flashed SD card into your ADB4006. Connect the ADB4006 to a network cable and to the power supply. | ||
| + | |||
| + | ==== Accessing the ADB4006 - monitor ==== | ||
| + | |||
| + | Connect these peripherals to your ADB4006: | ||
| + | |||
| + | HDMI monitor (1920x1080@60fps) | ||
| + | USB mouse | ||
| + | USB keyboard | ||
| + | |||
| + | Then login into the terminal on the screen with the user '''sompi''' and password '''ic''' | ||
| + | |||
| + | ==== Accessing the ADB4006 - serial interface ==== | ||
| + | |||
| + | Connect a '''UART Bridge''' to your ADB4006 and your PC, e.g.: | ||
| + | Debug UART Bridge (order no. 902.113) | ||
| + | |||
| + | The USB driver is available at [[Interface_Modules#USB-A_UART_Bridge_CP2102]] | ||
| + | |||
| + | Then open a serial terminal like Putty (Windows) or minicom (Linux) with baudrate setting '''115200 / 8N1''' and login with the user '''sompi''' and password '''ic''' | ||
| + | |||
| + | [[File:ICnova-A20-SODIMM-serial-console-jammy-login.png | 420px]] | ||
| + | ---- | ||
| + | |||
| + | === Application examples === | ||
| + | |||
| + | This section provides example applications for the [[{{PAGENAME}}]] which can be installed after following the [[#Quick_start]] guide. | ||
| + | |||
| + | ==== Docker ==== | ||
| + | |||
| + | Run the following commands to install '''Docker'''. | ||
| + | |||
| + | sudo apt update | ||
| + | sudo apt -y install docker-compose | ||
| + | |||
| + | This allows starting any available docker images, e.g. [[#Home_Assistant]]. | ||
| + | |||
| + | ==== Home Assistant ==== | ||
| + | |||
| + | This installation requires [[#Docker]]. | ||
| + | |||
| + | Run the following commands to install '''Home Assistant''' ([https://www.home-assistant.io/ home-assistant.io]). | ||
| + | mkdir home-assistant | ||
| + | cd home-assistant | ||
| + | wget https://ic42.de/Download/icnova/home-assistant/docker-compose.yml | ||
| + | sudo docker-compose up --detach | ||
| + | |||
| + | This might take a few minutes. | ||
| + | |||
| + | Run the following command to get your local IP address: | ||
| + | ip -4 -br address show dev eth0 | ||
| + | |||
| + | The output e.g. looks like this: | ||
| + | eth0 UP 192.168.4.187/24 metric 1024 | ||
| + | |||
| + | where '''192.168.4.187''' is the local IP address. | ||
| + | |||
| + | HomeAssistant can be accessed through a webbrowser by entering the URL http://192.168.4.187:8123/ (using your local IP address). | ||
| + | |||
---- | ---- | ||
| Line 91: | Line 164: | ||
=== Buildroot === | === Buildroot === | ||
| + | For professional or embedded applications, Buildroot allows you to create a minimal and optimized Linux operating system. | ||
The [[{{PAGENAME}}]] is supported by the official Buildroot, Kernel and U-Boot, support has been added with the corresponding releases listed in the table below: | The [[{{PAGENAME}}]] is supported by the official Buildroot, Kernel and U-Boot, support has been added with the corresponding releases listed in the table below: | ||
| Line 127: | Line 201: | ||
Then insert the SD-Card into the [[ICnova_ADB4006]]. | Then insert the SD-Card into the [[ICnova_ADB4006]]. | ||
| − | |||
| − | |||
The [[{{PAGENAME}}]] on an [[ICnova_ADB4006]] will then boot from the SD-Card and provide a linux console on the serial interface. | The [[{{PAGENAME}}]] on an [[ICnova_ADB4006]] will then boot from the SD-Card and provide a linux console on the serial interface. | ||
Login as "root" for which no password is set. | Login as "root" for which no password is set. | ||
| − | |||
| − | |||
== Downloads == | == Downloads == | ||
Latest revision as of 09:36, 22 October 2024
Contents |
[edit] Hardware
ICnova A20 SODIMM - high performance dual CORTEX-A7 SODIMM-200 compute module
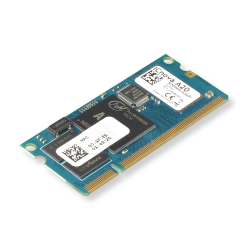
The ICnova A20 SODIMM is a SoC compute module equipped with an Allwinner A20 CPU.
It operates with an ARM dual CORTEX-A7 core with 1GHz CPU clock.
Features:
- Allwinner A20 dual Cortex-A7 processor with 1GHz CPU clock
- up to 1GB DDR3-RAM
- integrated 10/100 MBit Ethernet PHY
- power management unit
- all peripherals are accessible on connectors
- easy to use SODIMM-200 module (2.5V Version)
- temperature range from 0°C to +70°C
[edit] Suitable application development boards
In-Circuit offers a wide range of Application Development Boards that can be used to develop your products and solutions while reducing your development time.
These evaluation boards help you to evaluate the features and performance of selected products and system solutions. Our evaluation boards demonstrate optimized and tested solutions for your application design. These boards are designed mainly for your evaluation, design and testing purposes.
Basically all our ADBs feature: Ethernet, USB-Host, USB_Device, SDC
Exceptions to this are listed in the Notes column of the following table.
The table below shows the suitable Application Development Boards (ADB) for the ICnova A20 SODIMM.
| ADB | Picture | Supply voltage | Main features | Notes |
|---|---|---|---|---|
| ICnova ADB4006 | 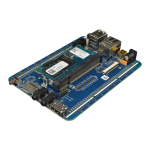 |
5V DC | HDMI connector, Ethernet, SATA interface, Analog audio input/output |
[edit] Software
The ICnova A20 SODIMM features an on-board hardware-bootloader which can boot the module from SD-Card.
For a quick start, ready-to-use Debian and Ubuntu SD images are available. For professional or embedded applications, you can create a minimalistic, optimized Linux operating system using Buildroot.
[edit] Quick start
[edit] Download an image
Download an image from the provided Debian/Ubuntu options.
| Operating System | u-boot | Kernel | Download | sha256 checksum |
|---|---|---|---|---|
| Debian 11 (bullseye) | 2024.07 | 6.6.56 | https://ic42.de/Download/icnova/sompi-6.6.56-bullseye.img.gz | 3fef2ceaad492767b1d09b20be0090007931c383956600ba37deb699fade9c9d |
| Debian 12 (bookworm) | 2024.07 | 6.6.56 | https://ic42.de/Download/icnova/sompi-6.6.56-bookworm.img.gz | 146fa93acdd397d6d2724f1fefdf64b272d27ed8818840c8bd074f9c8b0d5ee2 |
| Ubuntu 22.04 (jammy) | 2024.07 | 6.6.56 | https://ic42.de/Download/icnova/sompi-6.6.56-jammy.img.gz | 655a2bf615b06400424da85e2ae47a18892a54a61ad17403f861df38b3337016 |
[edit] Flashing the image onto the SD card
- Prepare the SD card: Insert the SD card (at least 8GB) into your laptop/PC.
- Download BalenaEtcher: A free tool for flashing images, available for Windows, Mac, and Linux at https://www.balena.io/.
- Flash the image: Open Etcher, select the downloaded image and your SD card, then click "Flash." This will take a few minutes.

[edit] Connecting the ADB4006
Insert the flashed SD card into your ADB4006. Connect the ADB4006 to a network cable and to the power supply.
[edit] Accessing the ADB4006 - monitor
Connect these peripherals to your ADB4006:
HDMI monitor (1920x1080@60fps)
USB mouse
USB keyboard
Then login into the terminal on the screen with the user sompi and password ic
[edit] Accessing the ADB4006 - serial interface
Connect a UART Bridge to your ADB4006 and your PC, e.g.:
Debug UART Bridge (order no. 902.113)
The USB driver is available at Interface_Modules#USB-A_UART_Bridge_CP2102
Then open a serial terminal like Putty (Windows) or minicom (Linux) with baudrate setting 115200 / 8N1 and login with the user sompi and password ic

[edit] Application examples
This section provides example applications for the ICnova A20 SODIMM which can be installed after following the #Quick_start guide.
[edit] Docker
Run the following commands to install Docker.
sudo apt update
sudo apt -y install docker-compose
This allows starting any available docker images, e.g. #Home_Assistant.
[edit] Home Assistant
This installation requires #Docker.
Run the following commands to install Home Assistant (home-assistant.io).
mkdir home-assistant
cd home-assistant
wget https://ic42.de/Download/icnova/home-assistant/docker-compose.yml
sudo docker-compose up --detach
This might take a few minutes.
Run the following command to get your local IP address:
ip -4 -br address show dev eth0
The output e.g. looks like this:
eth0 UP 192.168.4.187/24 metric 1024
where 192.168.4.187 is the local IP address.
HomeAssistant can be accessed through a webbrowser by entering the URL http://192.168.4.187:8123/ (using your local IP address).
[edit] Buildroot
For professional or embedded applications, Buildroot allows you to create a minimal and optimized Linux operating system.
The ICnova A20 SODIMM is supported by the official Buildroot, Kernel and U-Boot, support has been added with the corresponding releases listed in the table below:
| Buildroot | 2023.11 | https://buildroot.org/ |
| Kernel | 6.5 | https://kernel.org/ |
| U-Boot | v2024.01 | https://u-boot.org/ |
To build new software for the ICnova A20 SODIMM on an ICnova_ADB4006 a buildroot environment must be prepared following the official documentation on https://buildroot.org/docs.html.
Then proceed to build the software by following the steps listed below:
buildroot$ make clean
buildroot$ make icnova-a20-adb4006_defconfig
buildroot$ make
The generated software image can then be flashed onto a SD-Card (e.g. located at /dev/sdc):
buildroot$ sudo dd if=output/images/sdcard.img of=/dev/sdc bs=4096
Then insert the SD-Card into the ICnova_ADB4006.
The ICnova A20 SODIMM on an ICnova_ADB4006 will then boot from the SD-Card and provide a linux console on the serial interface. Login as "root" for which no password is set.